Caching PHP requests can dramatically reduce server resources per request and make the pages load time decrease substantially. In this tutorial we are going to utilize the fastcgi_cache functions in nginx to cache PHP requests making it.
This tutorial assumes you have the following already completed on your server:
Nginx installed, if you do not please follow – Nginx Compile From Source On CentOS
The ngx_cache_purge module already installed – How to install the ngx_cache_purge module in Ningx
FastCGI setup and running – PHP-FPM Installation
It also assumes you already have a WordPress installation as this will just cover setting up the fastcgi_cache to work with WordPress.
Nginx fastcgi_cache Configuration
First make a directory in /var/run , this is where the fastcgi_cache will store the files in memory
mkdir /var/run/nginx-cache
You will then need to edit the Nginx configuration
nano /etc/nginx/nginx.conf
You will want to add the following lines in the http{} block before the server{} configuration
 fastcgi_cache_path /var/run/nginx-cache levels=1:2 keys_zone=WORDPRESS:100m inactive=60m;
 fastcgi_cache_key "$scheme$request_method$host$request_uri";
 fastcgi_cache_use_stale error timeout invalid_header http_500;
 fastcgi_ignore_headers Cache-Control Expires Set-Cookie;
The above lines set the caching directory, cache levels and keys_zone. The fastcgi_cache_use_stale option will try to use cached files even if PHP-FPM has crashed or has been shutdown.
You will then want to add the following to the server{} configuration:
add_header X-Cache $upstream_cache_status;
What this does is allows you to see if Nginx is caching a request later on
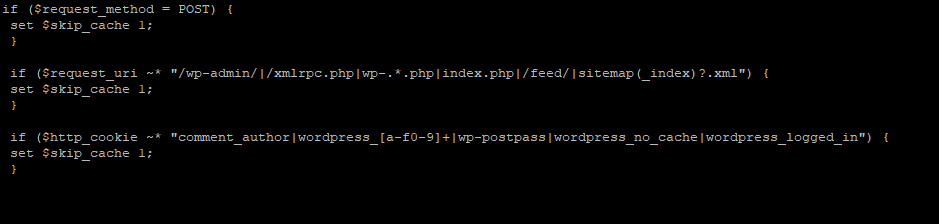
 if ($request_method = POST) {
 set $skip_cache 1;
 }

 if ($request_uri ~* "/wp-admin/|/xmlrpc.php|wp-.*.php|index.php|/feed/|sitemap(_index)?.xml") {
 set $skip_cache 1;
 }

 if ($http_cookie ~* "comment_author|wordpress_[a-f0-9]+|wp-postpass|wordpress_no_cache|wordpress_logged_in") {
 set $skip_cache 1;
 }
The above statements allow you to bypass the cache when you are logged into the administrative interface etc.
Add the following to location ~ \.php$ {} block that sends the PHP requests to PHP-FPM
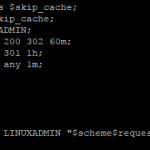
 fastcgi_cache_bypass $skip_cache;
 fastcgi_no_cache $skip_cache;
 fastcgi_cache WORDPRESS;
 fastcgi_cache_valid 200 302 60m;
 fastcgi_cache_valid 301 1h;
 fastcgi_cache_valid any 1m;
The above block fast_cache_valid entries specify which type of requests to cache and for how long.
And finally add a purge folder to in the server{} configuration:
location ~ /purge(/.*) {
 allow 127.0.0.1;
 deny all;
 fastcgi_cache_purge WORDPRESS "$scheme$request_method$host$1";
 }
Once all of that has been completed, you can go ahead and restart nginx.
/etc/init.d/nginx restart
Nginx Helper Plugin Configuration
You will then want to cd to the wp-content/plugins directory and get the Nginx Helper plugin
wget https://downloads.wordpress.org/plugin/nginx-helper.1.9.10.zip
Uncompress the zip file
unzip nginx-helper.1.9.10.zip
Activate the plugin in WordPress and select the following options:
Under Purging Options select:
Enable Cache
Under Caching Method select:
Nginx FastCGI cache
Under Purge Method select:
Using a GET request to PURGE/url(Default option)
And click save to save the configuration.
To test you should now try a curl to check the headers to ensure a HIT for the X-Cache header We set earlier.
# Curl -Is http://domain.com |grep X-Cache
 X-Cache: MISS
If this is the first request to that page since the cache has been active that is expected. A MISS means the page has not been cached yet.
On subsequent requests you should see
# Curl -Is http://domain.com |grep X-Cache
 X-Cache: HIT
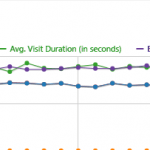
If you do get a X-Cache: BYPASS one of the rules we set earlier is causing the cache to be ignored. Try testing your site in one of the various speed test programs such as https://tools.pingdom.com you should notice a much improved load time over a non-cached WordPress install.