This article covers creating a new virtual machine with KVM. It is based on CentOS however the majority applies to any OS using KVM. We are going to build a CentOS 7 virtual machine.
Virtual Machine CLI Installation:
Install wget if you don’t already have it:
yum -y install wgetPart of this requires desktop
First grab a CentOS iso:
wget -O /tmp/CentOS-7-x86_64-Minimal-1611.iso http://mirror.tocici.com/centos/7/isos/x86_64/CentOS-7-x86_64-Minimal-1611.isoNext start virt-installer:
virt-install --name=centos7-1 --ram=1024 --vcpus=1 --cdrom=/tmp/CentOS-7-x86_64-Minimal-1611.iso --os-type=linux --os-variant=rhel7 --network bridge=bridge1 --graphics=spice --disk path=/var/lib/libvirt/images/centos7-1.dsk,size=4-name – Name of the virtual machine
-ram – Memory allocation in MB
-vcpus – Virtual CPU allocation
-cdrom – Location of the ISO
-os-type – OS type(linux, windows etc)
-os-variant – OS variant (rhel 6, rhel7, solaris etc)
-network – network configuration
-graphics – display for install
-disk path – path to create disk image associated with virtual machine
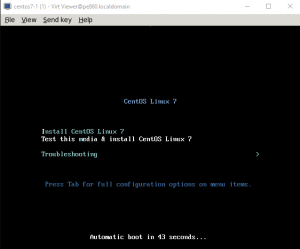
Once you have entered the command, It will then start then install then open virt-viewer to finish the installation
You should see a install screen appear similar to the screen shot below. Go ahead and select Install and follow the installation.
Graphical Installation
To perform a complete install over the graphical user interface, you will need to type the following on the command line:
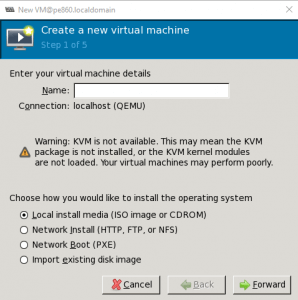
virt-managerVirt-manager should open, click on the new icon to add a new virtual machine. Fill out the name field to what you want to call the virtual machine and select a Local install Media and click on Forward
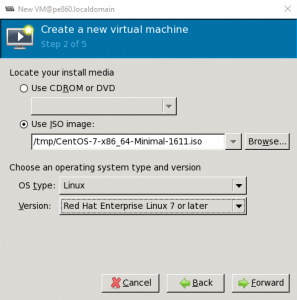
On step 2, select the path to the ISO image, if you did the wget earlier you can fill in /tmp/CentOS-7-x86_64-Minimal-1611.iso and select OS Type: Linux, Version: Red Hat Enterprise Linux 7 or later:
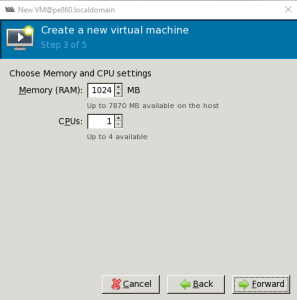
For Step 3, Select the amount of memory and CPUs for the VM
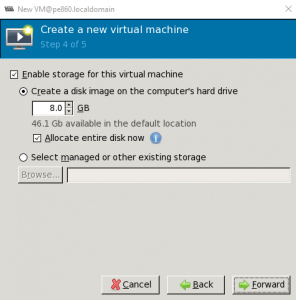
For step 4, Select the size of the Disk for the Virtual Machine:
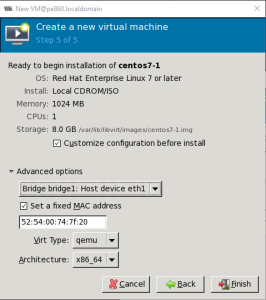
For step 5, Under advanced options choose the bridge and click on finish:
After this the same install screen will open as you would see if you did virt-viewer, you can follow the instructions to finish the install.
Part 1: KVM Installation on CentOS
Part 2: Bridged Networking Setup for KVM Virtualization
Part 3: Creating A New Virtual Machine with KVM