By default Kernel-Based Virtual Machines(KVM) are not set up to access a serial console on the host using virsh. To enable a serial virsh console, so you can view text-based output on the host machine from the virtual machine you will need to make modifications to both the virtual machine and the physical machine. Enabling serial console access can be beneficial when troubleshooting boot issues or accessing the virtual machine if networking is not working correctly at that time. You can read more about virsh commands on redhat’s website.
Enable VIRSH Console on the Virtual Machine
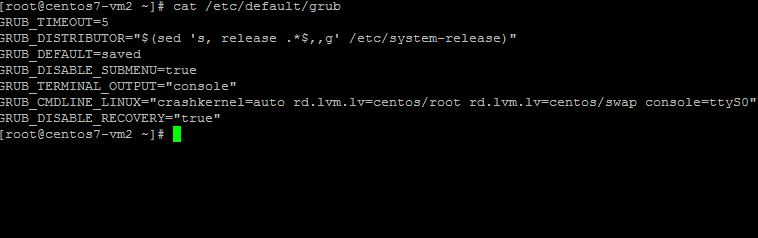
First, log in to the virtual machine and edit /etc/default/grub and change this line from:
GRUB_CMDLINE_LINUX="crashkernel=auto rd.lvm.lv=centos/root rd.lvm.lv=centos/swap rhgb quiet"
To
GRUB_CMDLINE_LINUX="crashkernel=auto rd.lvm.lv=centos/root rd.lvm.lv=centos/swap rhgb quiet console=ttyS0"
If you want to see the output of boot messages you can also remove “rhgb quiet” from the console line as well. Save the file then remake the grub config
grub2-mkconfig -o /boot/grub2/grub.cfg
Enable Serial Console Access on the KVM host
Now you will need to login to the host machine to edit the xml file relating to that virtual machine
virsh edit
Replacing vm-name with the correct virtual machine name.
Once you are in the configuration you will need to change
 <console type='pty'>
<target type='serial' port='0'/>
</console>
To
<console type='pty' tty='/dev/pts/6'>
<source path='/dev/pts/6'/>
<target type='serial' port='0'/>
<alias name='serial0'/>
</console>
Then you can go ahead and save that file, by default it uses vi, so to save type
:wq
Then go ahead shut down the VM
virsh shutdown <vm-name>
Then recreate it
virsh start <vm-name>
Access The KVM Through the Console
You should now be able to attach a console to the virtual machine by typing
virsh console <vm-name>
To exit out of a virsh console you will need to press ctrl + ] at the same time and that will break out of the console session.
Thanks for sharing your info. I really appreciate your efforts and I will be waiting for your next write ups thanks once again.